1
/
of
2
REDARC
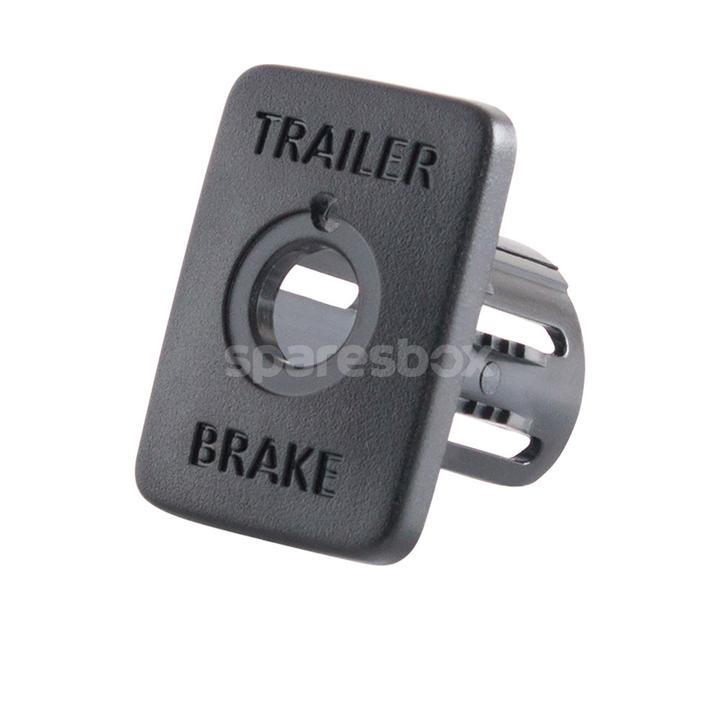
REDARC Tow-Pro Elite Switch Insert Universal TPSI-001
REDARC Tow-Pro Elite Switch Insert Universal TPSI-001
Regular price
$18.95 AUD
Regular price
Sale price
$18.95 AUD
Unit price
/
per
Tax included.
Couldn't load pickup availability
You can now create a remote head mount that looks like the OE version and maintains ADR21 Compliance (assuring it's fitted correctly). The REDARC Universal Tow-Pro Elite Switch insert Panel is your solution when a suitable switch blank is not available to the vehicle and it comes with a two year manufacturer's warranty. The Switch Insert Panel aims to assist you with the installation of the Tow-Pro Remote Head, which has been credited as leading automotive technology. professional, OE-looking fitment is achieved through a drilling template and self-adhesive gaskets for curved dash installations.
Tow-Pro Universal Switch Insert Panel Specifications
Warranty: 2 Years
Weight (kg): 0.05
Mounting: 25mm or 1" diameter hole
Fascia - Width (mm): 28
Fascia - Height (mm): 38
Tow-Pro Universal Switch Insert Panel Fittings Instructions
STEP 1
- Select a suitable location for mounting the Remote Head
- Cut out the template (1) from the bottom of these instructions
- Check template scale is printed correct full size)
- position and place the template with masking tape, ensuring that both axis are vertical and horizontal in the vehicle as shown
STEP 2
- It is recommended that the Trim Panel is removed from the vehicle for the drilling process
- If that is not possible, ensure that the area underneath the drill area is clear of any wiring or other parts that may be damaged
- Drill two 4mm (5/32") diameter pilot holes shown on template
- Open up the lower large hole with a 25mm (1") diameter hole saw (1) as shown
STEP 3
- Remove any burrs or other material from around the hole to ensure that the remote head can clip into place correctly
- Discard/do not fit the grey plastic bezel/spacer
- Install remote head (1) into Fascia (2)
- Torque nut (3) to 0.8Nm
CAUTION do not overtighten the nut
- Fit knob (4) (alignment info is in the Tow-Pro Elite Trailer Brake Controller User Manual
STEP 4
- Remove template
- Pass the data cable (1) through the hole
- Plug in the data cable connector (1) to remote head (2)
- Push & fit fascia firmly into the hole
- The supplied neoprene gaskets may be applied behind the fascia to improve the fit to the mounting surface
Share